1. Determining your firmware
- As stated before, jailbreaking can only be achieved on a firmware lower than latest.
- To determine your firmware navigate on your PS4 to Settings > System > System Information.
- Take note of your firmware. If you're on 9.00 or anything lower you can continue.
2. What firmware is the best and what should I do
To keep it short, different firmwares will need different exploits, thus can lead to various levels of stability and success rates. Please do keep in mind that they can be updated in the future. If you are on:
- <5.05 - either keep it for archiving purposes or update to 5.05 or 9.00.
- 5.05 - it’s considered the gold firmware because of its stability and success rate. Either stay on it or update to 9.00 (note that you will need to backport most of your new games in order to play them - a guide can be found here
- 6.72 - stay on it or update to 9.00
- 7.02 & 7.5x (7.50, 7.51 & 7.55) - update to 9.00
- 8.0x & 8.50 - update to 9.00
- 9.00 - currently the latest exploitable firmware - Stay!
2.1 Update without erasing HDD
- Download 9.00 (or your desired) firmware file on your PC by visiting one of the sites (do not get beta firmwares, get update firmware - should be 500MB or under):
- Unpack your archive and rename the file to PS4UPDATE.pup (must be in all caps).
- Prepare a USB stick drive by formatting it to FAT32 and creating a folder on the root of the drive named PS4 and another folder inside PS4 named UPDATE. Copy PS4UPDATE.pup in the UPDATE folder.
Final structure should look like this: PS4 > UPDATE > PS4UPDATE.pup
- REMOVE ETHERNET CABLE AND DISABLE ANY CONNECTION TO INTERNET INCLUDING WI-FI
- If you received a update notification, MAKE SURE TO REMOVE THE PENDING UPDATE FILE
- Plug in the USB drive to the PS4.
- Navigate to Settings > System Software Update. Check to see what version would it update to. DO NOT CLICK NEXT IF THE FIRMWARE YOU WANT TO UPDATE TO IS NOT THE SAME.
- Select Next, Accept the terms then Update.
- Your PS4 will begin to update, wait and have patience.
3. Jailbreaking your PS4
- REMOVE ANY ETHERNET CABLE AND/OR SKIP WI-FI CONNECTION. Keep everything offline.
- Navigate to Settings > System > Automatic Downloads > Uncheck Featured Content, System Software Update Files, Allow Restart and Application Update Files.
- Navigate to Settings > Network > Check Connect to the Internet, then Set Up Internet Connection and:
Connection: Wi-Fi or LAN cable
Set Up: Custom
IP Address: Automatic
DHCP Host Name: Do Not Specify
DNS Settings: Manual
Primary DNS: 192.241.221.79            - Explanation: This DNS will redirect you to the jailbreak website.
Secondary DNS: 165.227.83.145          - Explanation: This DNS will block every connection to any Sony/PlayStation server.
MTU Settings: Automatic
Proxy Server: Do Not Use
- Note!: For some people, you might get WV-XXX error when visiting the exploit host via DNS. That’s because their Internet Provider will block DNS’s, thus not allowing you to use the 2 DNS Addresses. If you are one of those people please use
ALTERNATIVE GUIDE
- IF ON A FIRMWARE LOWER THAN 9.00 SKIP THIS. Download Rufus and exfathax.img on your PC. Plug a USB drive to your PC.
Rufus - Create bootable USB drives the easy way
pOOBs4/exfathax.img at main · ChendoChap/pOOBs4 (github.com)
- IF ON A FIRMWARE LOWER THAN 9.00 SKIP THIS. In Rufus > Device (select your USB stick) > Boot Section: Disk or ISO image and select exfathax.img > Start. Note that will erase the USB drive.
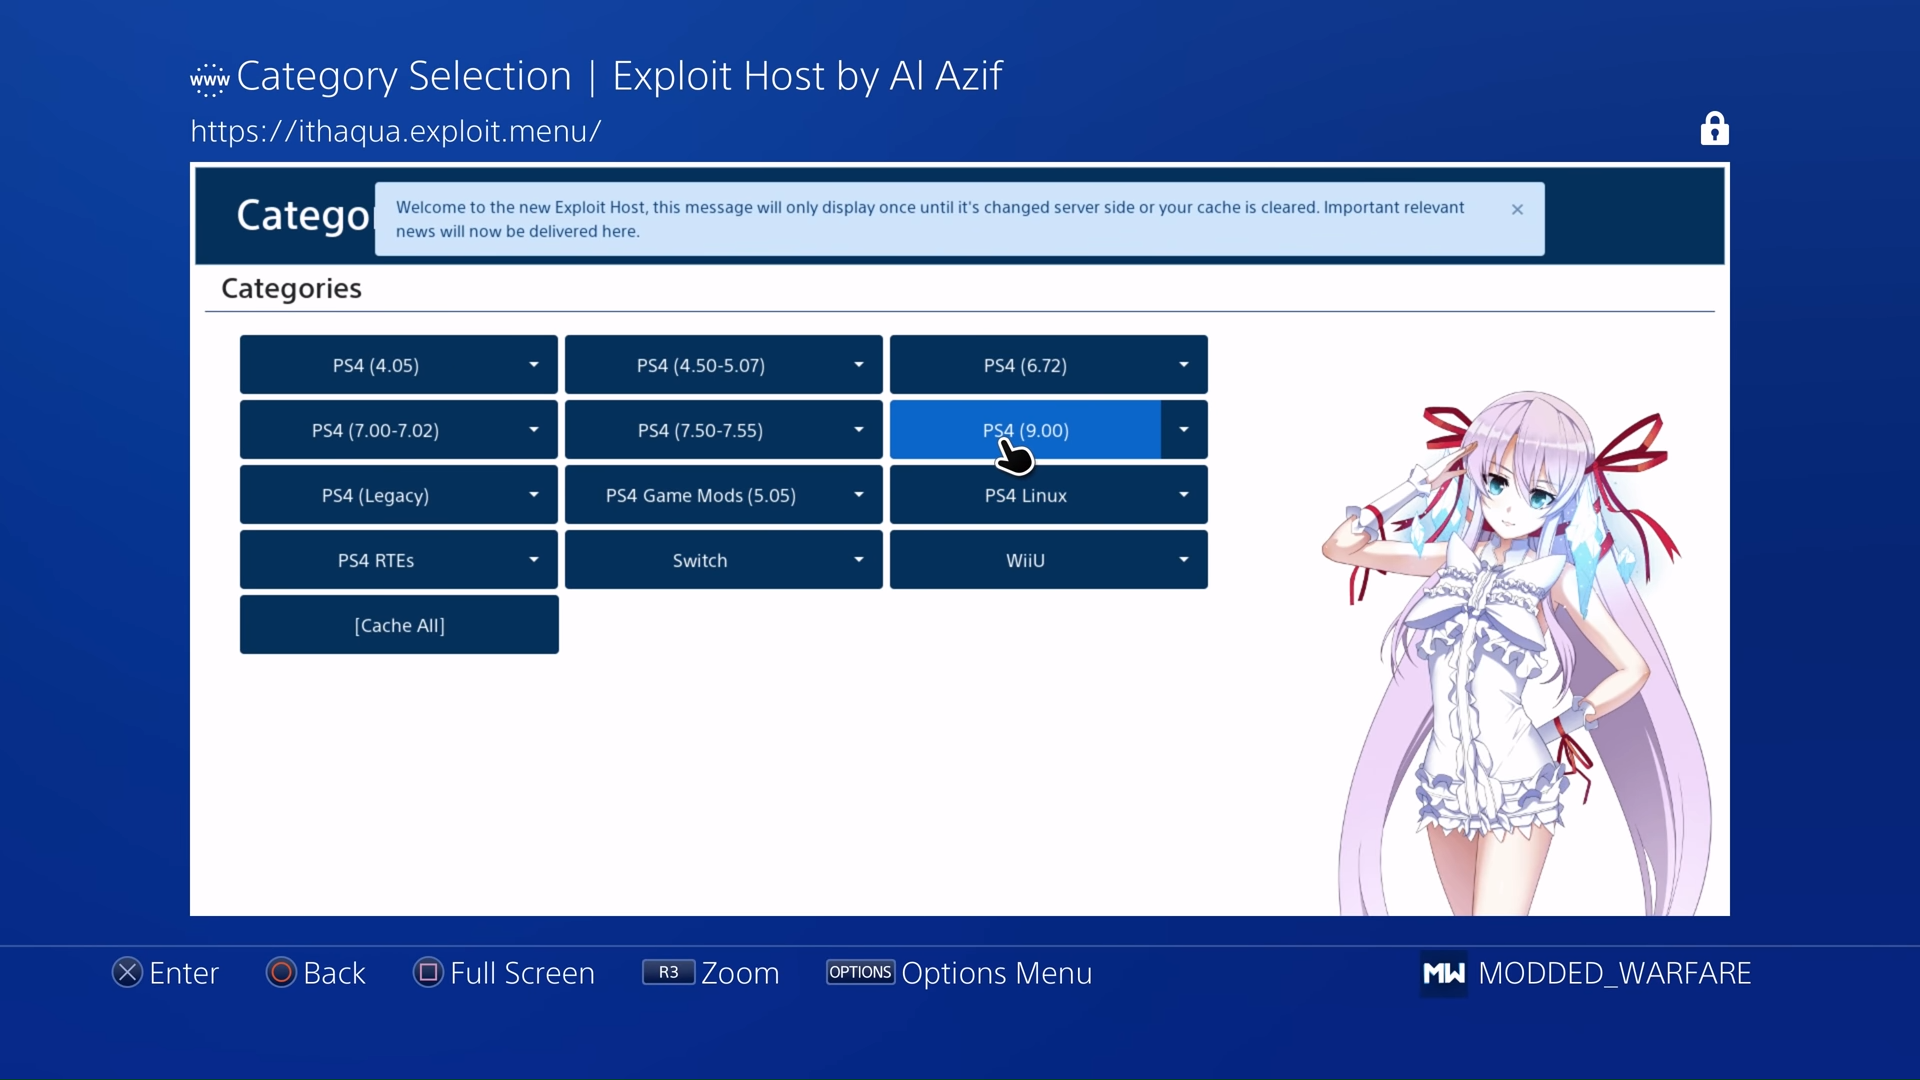
- Back on the PS4, navigate to Settings > User's Guide/Helpful Info > User Guide. The website should now look like this:

- Wait to cache the theme. Select your PS4 version. Select GoldHEN. Do not move your mouse cursor and have patience. If you see not enough memory errors, select OK and continue until you see this screen:
FOR 9.00 ONLY:

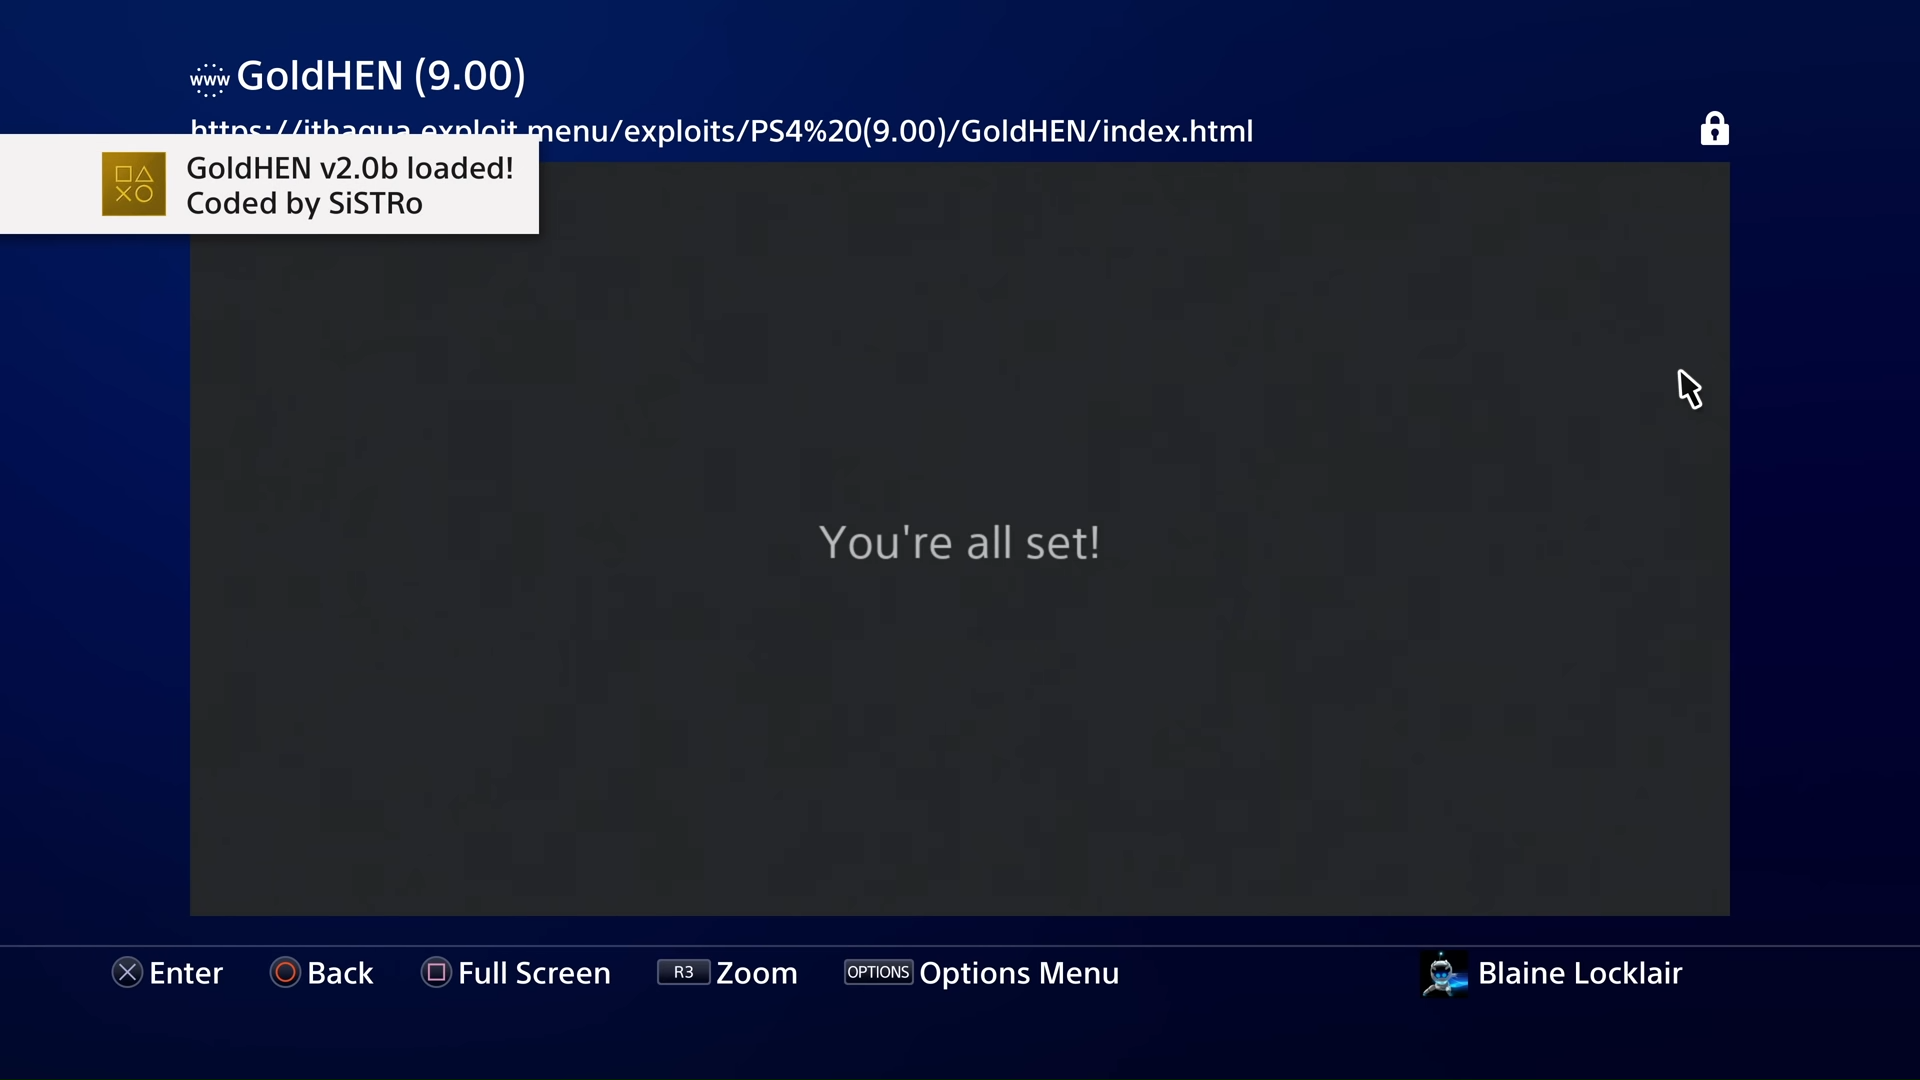
If you see this plug your USB drive we did with Rufus, wait until the notification pops and disappears, then press OK. If you see this screen, it means you now jailbroken the PS4 (also on FW lower than 9.00 this should appear without a USB drive):

- Congratulations, you now have jailbroken your PS4! Enjoy! (9.00 users, you need to remove the USB after you see the "You're all set!" screen).
4. Final questions and answers and troubleshooting
- An error " Not enough memory" appears. It's a normal error. Keep pressing OK until you pass it.
- My PS4 just shutdown/rebooted itself. Also a normal thing that can happen. Do not worry, remove the USB drive if on 9.00 and keep trying the same procedure starting with User Guide.
- I rebooted the PS4, and now I can't launch my games/apps. Jailbreaking is not persistent/permanent and as a result you need to rejailbreak your PS4 every time you reboot/shut down your PS4. As a alternative, you can put your PS4 on rest mode and you don't need to rejailbreak.
- Will my PS4 die from doing this? No, even forced reboots won't kill your PS4 unless you're doing it every 2 seconds for years :)
Congrats, you have now jailbroken your PS4!
Credits for images: Modded Warfare & Blaine Lockflair